This is part of a series of hands-on tutorials. To get the most value, follow along and do your own experiments on shadertoy. I will not be sharing copy-pasteable snippets; only screenshots from shadertoy.
Given a point in space, the signed distance function/field of a shape gives us the distance between that point and the nearest edge of the shape.
If the point is inside, the value is negative. If outside, the value is positive. (This is a convention, we can do the opposite too).
This allows us to do all sorts of interesting things with 2D shapes, as we will see.
Circle
Given a circle defined by a center and a radius, and given an arbitrary point, we can easily find the signed distance value for the point.
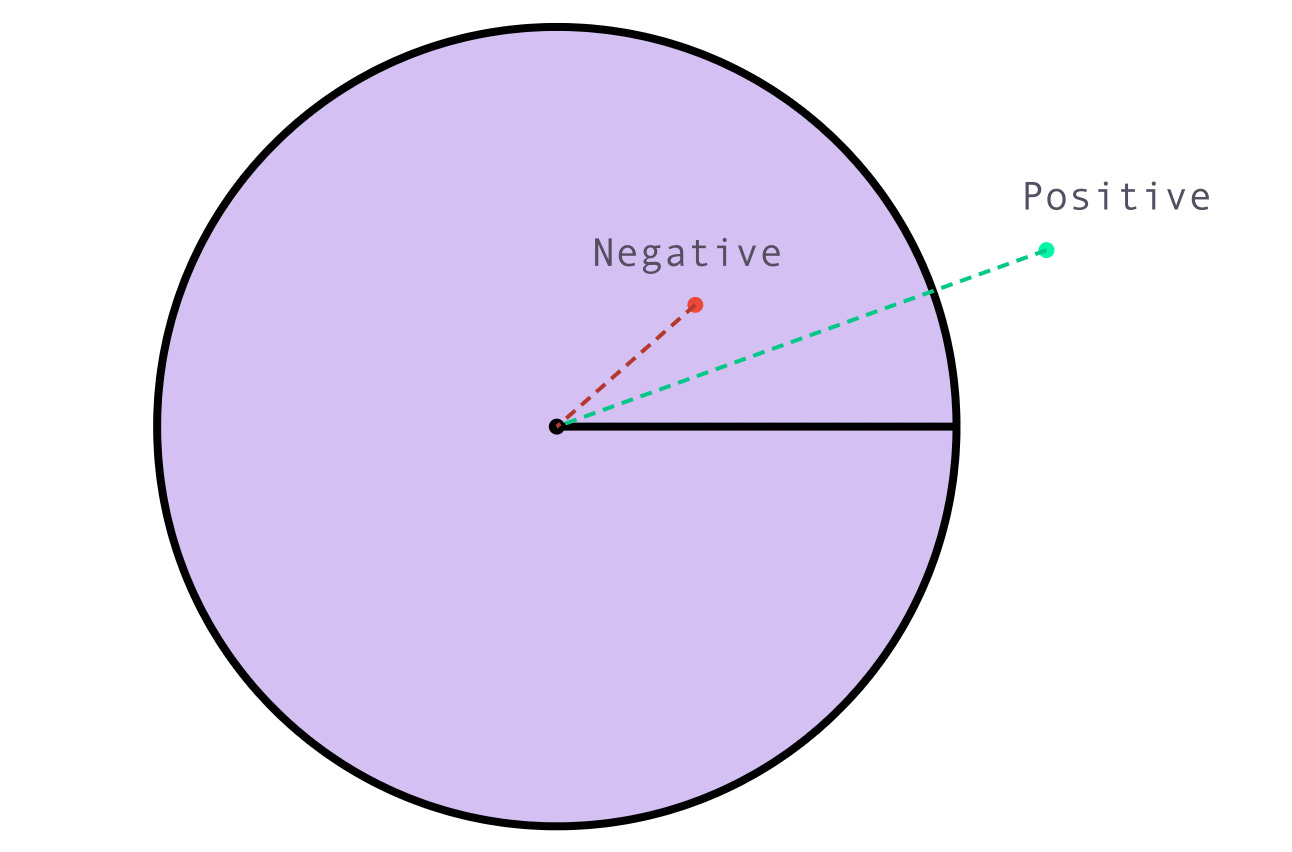
Look at the picture below. We have two points. A green point outside, and a red point inside.
We can measure the length from the point to the center with basic 2D vector math.
length(point - center) If the length is smaller than the radius, the distance should be negative. If it's bigger, the distance should be positive.
length(point - center) - radius Since the circle has a uniform shape, the difference between the radius and the length computed above exactly matches the definition of the SDF.
Here I used the distance directly as the color value. This results in black for negative values (inside the circle) and white for positive values (outside the circle).
Why? Let's take a look.
The function gives the distance in pixel units, so if a point is 2 pixels outside the circle, the dist variable will have value 2. If a point is 2 pixels inside the circle, the dist variable will have value -2.
But the color values are only valid in the range 0 to 1. So we get the color (0,0,0,0) for all points inside the circle, and the color value (1, 1, 1, 1) for all points outside the circle.
But we can do better!
We’ll look at:
Filling with a color
Drawing a border
Dropping a shadow
Looking at the large picture, we are not going to just be drawing one shape and be done. We'll be drawing many shapes and composing them together to produce the final result.
To make this composition possible, we set the color values for all pixels outside the shape to transparent, and all pixels inside the shape to the fill color.
To make this possible, we’ll need to look first at color compositing.
Color Compositing
Did you notice how the color (0, 0, 0, 0) was rendered as black, even though having alpha channel set to 0 should make it transparent? Well, the final output has no transparency so the alpha channel is ignored.
You can test with any other color value, for example, (1, 0, 0, 0) will show red:
The alpha channel only makes sense when we have a “front” color that has an alpha channel and we want to place it on top of the “background” color.
If the alpha channel is 0, we take the background. If it’s 1, we take the front. If it’s in between, it serves as a factor for how much of the front is taken.
The builtin function mix will do that for us.
Here I place a partiall transparent green on top of the background red, and it gives us an olive-like color.
This will form the basis of how we place shapes on top of each other too.
So with that out of the way, let’s talk about filling a shape using its SDF.
Filling with a color
Given a specific fill color, we want to derive a computation that sets the color of the pixel to the fill color when the sdf value is less than 0.
We can start by reversing the sign. This will make it so that the sdf is positive inside the circle.
We would also like to not have very large values. We just want a value between 0 and 1 so that we can multiply it with the color.
We can probably bruteforce this with an expression like:
f = dist < 0 ? 1 : 0But I want to introduce the step and the smoothstep functions because they will help us achieve more useful results.
The step takes a threshold number where anything below becomes 0 and anything above becomes 1.
Here’s an arbitrary example from graphtoy:
For starters we’ll use step(0, -dist) to get the color:
It basically works. We have a background color, and we have a circle drawn with a specific color.
The only problem is the shape is actually aliased. It might not seem like it in the screenshot because the image is scaled down. But if you zoom it, the artifacts are clearly visible.
What we want is, instead of jumping from 0 to 1 around the edge, we want to have the pixels on the edges have some transparency.
So intead of step, we can use smooth step.
It’s essentially just like step, but allows us to introduce some smoothness in the transition from 0 to 1.
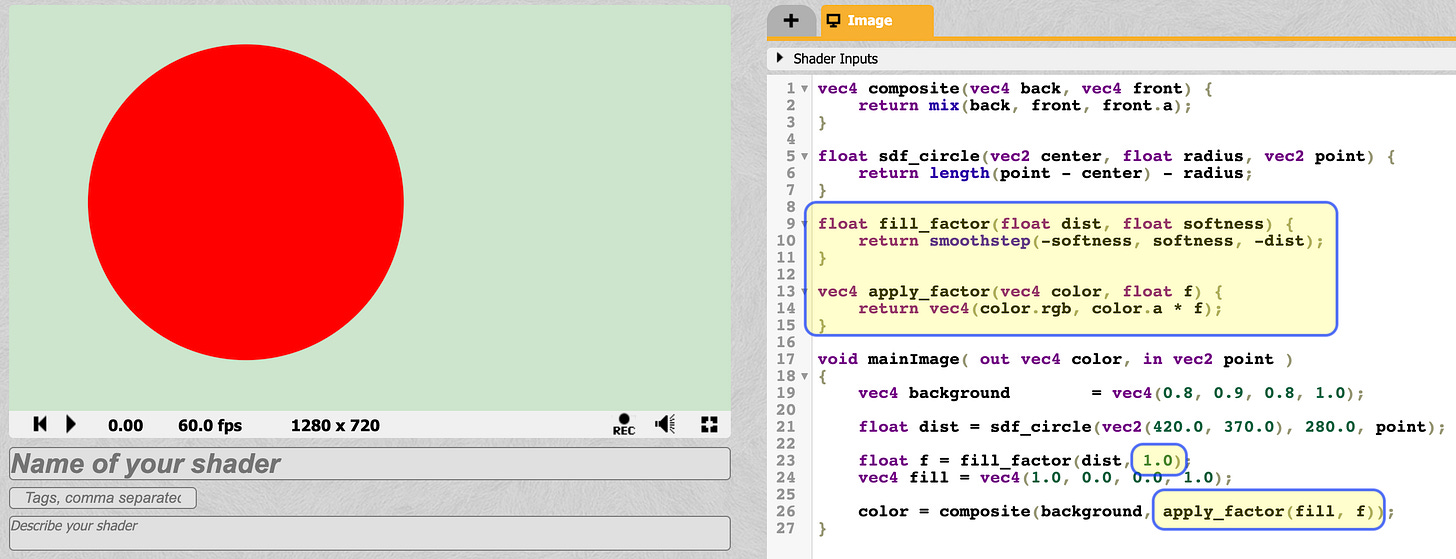
So for our case, instead of passing 0 to step, we can pass -1 and 1, so that the pixels around the edge get partial transparency. Perhaps we want to experiment with other ranges, such as -0.5 and +0.5, or -2 and +2. So I’ll make this a parameter, call it “softness”.
Also for this “factor”, we should not be multiplying the whole color with it like the shadertoy example above. Only the alpha channel.
So with this in place, here’s our new result:
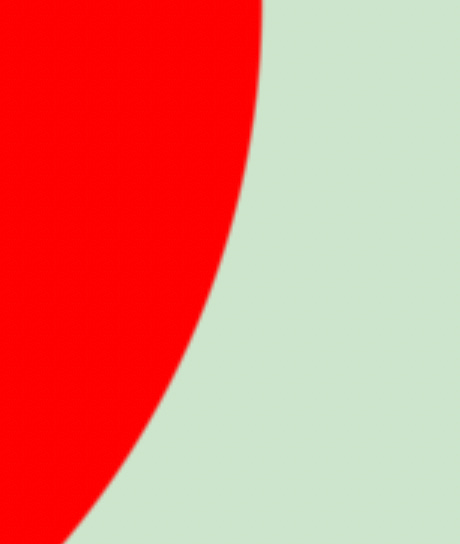
And if we zoom in, we can see the edges are not jagged anymore!
Drop Shadow
If we increase the softness factor, we get a blurry circle
We can use this to implement drop shadows (or soft highlights).
To do a drop shadow, we’ll first draw a blurry circle in black color at a slight offset, then we draw the regular circle.
The code is getting larger so I’m only showing the main function (none of the helpers changed).
We can also do a soft highlight instead, on a darker background, by simple changing the parameters:
Borders
Remember that the signed distance value tells us how many pixels away we are from the border.
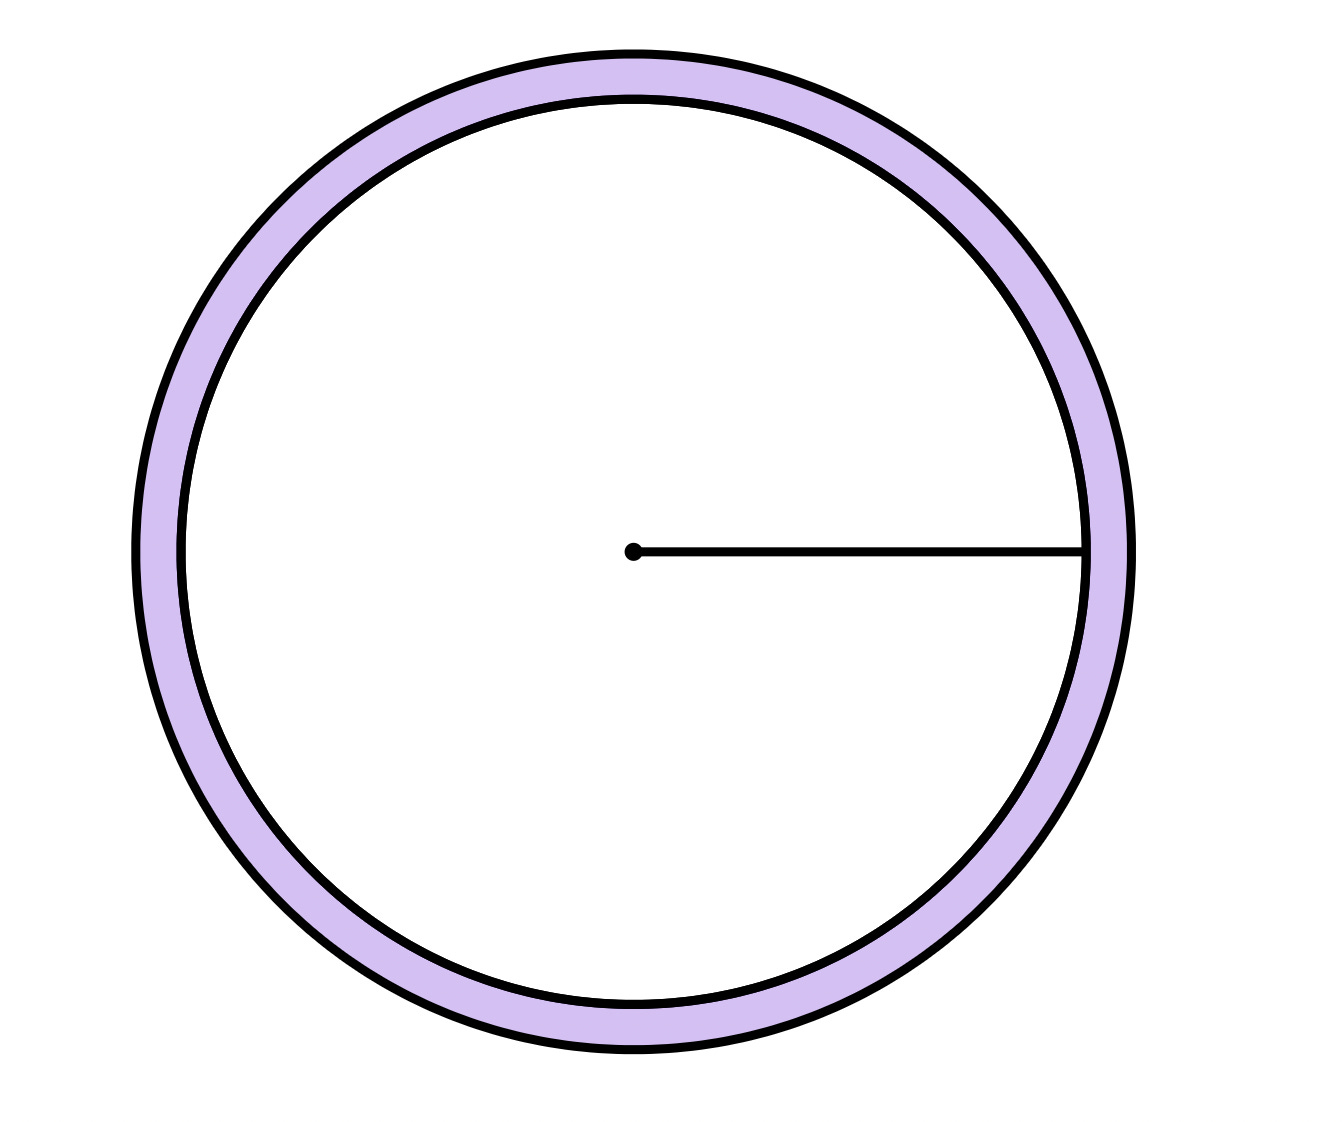
Let’s say we want to draw a 10px border on the outside of the circle. How would we do that?
I propose we take the distance value we have, and transform it to produce a new signed distance field for the border shape.
The original distance value we got from sdf_circle will now be treated as a point along a 1D line, and will be used as the input to a new signed distance function that will produce the SDF for the border shape.
It’s actually surprisingly simple.
Think of it as 1D circle. We have a “center” point, and a “half_width”. We can measure the distance from any point to the center and compare it with the half-width (just like we did with the circle).
In the case of the circle, we took the length from the point to the center then subtracted the radius.
To do the same thing here, the distance between the point and the center is the absolute value of their difference, and instead of a radius, we have a half_width.
float sdf_border(float center, float half_width, float dist) {
    return abs(dist - center) - half_width;
}
This method has the advantage of covering whether you want to draw the border inside the shape, outside, or on its center. It even lets you draw a border “away” from it. The placement of the border is completely controlled by the two parameters: center and half_width.
Since this returns a proper signed distance value, we can do all the same tricks with the fill and the shadows!
Here’s how it looks like when we draw it:
Now, if you have been following along, you should be able to play around with this and produce various shapes.
Here’s a voluntary homework. I will share the solution at the beginning of the next installment. The exact values don’t have to be the same. Just make sure that you know how to combine all the ideas in this tutorial to produce something kinda like this without having it all spelled out for you.
For the next installment, we’ll be talking about rectangles and rounded corners. Most of the things we’ll be drawing in UI are basically rounded rectangles: buttons, windows, panels, menus, etc. Even a straight line can be concieved of as a very thin rectangle. I’ll also aim to be looking at clipping and possibly rotations.
See you next time.


